Priročnik Electrolux PD91-4DB Sesalnik

Potrebujete priročnik za vaš Electrolux PD91-4DB Sesalnik? Spodaj si lahko brezplačno ogledate in prenesete PDF priročnik v slovenščini. Ta izdelek ima trenutno 10 pogosto zastavljeni vprašanji, 1 komentar in 1 glas s povprečno oceno izdelka 0/100. Če to ni priročnik, ki ga želite, nas kontaktirajte.

Ali je vaš izdelek okvarjen in v priročniku ne najdete rešitve? Obiščite Repair Café za brezplačno popravilo.

Priročnik

Loading…

1 32 4
2www.electrolux.com
13 14
17
16 18
5 876
9
1211
2625
19 20
22
21
15
10
23
24
3www.electrolux.com
ENGLISH
Thank you for choosing Electrolux PURED9 vacuum cleaner. Always
use original accessories and spare parts to get the best results. This
product is designed with the environment in mind. All plastic parts are
marked for recycling purposes.
BEFORE STARTING
• Read this manual carefully.
• Check that all parts described are included.
• Pay special attention to the safety precautions!
DESCRIPTION OF PURED9 VACUUM CLEANER
A. Display (see versions later)
B. Exhaust lter lid
C. Exhaust lter
D. Parking slots
E. Power cord
F. Motor lter
G. Motor lter holder
H. S-bag®
I. S-bag® holder
J. Dust compartment cover
K. AeroPro 3in1 tool
L. AeroPro hose
M. AeroPro handle (see versions
later)
N. AeroPro telescopic tube
O. Parking clip
P. Display for models with rotary
knob manual control*
Q. Display for models with remote
control*
R. Display for models with remote
control and AUTO function*
S. AeroPro Classic handle*
T. AeroPro Ergo handle*
U. AeroPro Remote Control
handle*
V. AeroPro FlowMotion nozzle*
W. AeroPro PureVision nozzle
(with front lights)*
X. AeroPro Turbo nozzle*
Y. AeroPro Mini Turbo nozzle*
Z. ParkettoPro nozzle*
AA. AeroPro FlexProPlus nozzle*
AB. AeroPro Long crevice nozzle*
* Certain models only
HOW TO USE THE VACUUM CLEANER
1 Open the dust compartment cover by pulling the S-BAG button. Check
that the dust bag (s-bag) is in place.
2 Insert the hose into the cleaner (to remove it, press the lock buttons
and pull). Insert the hose into the hose handle until the lock button
clicks (to release it, press the lock button
and pull).
3 Attach the telescopic tube to the nozzle. Attach the telescopic tube to
the hose handle (to remove it, press the lock button and pull).
4 Adjust the telescopic tube by holding the lock with one hand and
pulling the handle with the other hand.
START/STOP THE VACUUM CLEANER AND ADJUST SUCTION POWER
5 Pull out the power cord and plug it into the mains. Press the ON/
OFF button to turn the cleaner on/o. Indicators light up, MIN/MAX
indicator lights up from left to right and back (auto function models).*
Models with remote control can also be operated by the ON/OFF
button on the handle.*
6 Adjust suction power (manual control models): Turn the rotary knob on
the cleaner or use the air valve on the handle.*
7 Adjust suction power (remote control models): Press +/- button on the
handle. MIN/MAX and symbols indicators on display will show level of
power.*
8 Adjust suction power (remote control models with AUTO): The cleaner
starts in AUTO mode (automatic power regulation). AUTO indicator is
illuminated on the display and MIN/MAX indicator pulses. To regulate
power manually press +/- button on handle. Press AUTO button to
return to auto-function.*
9 After cleaning, push the REWIND button to rewind the cable.
PARKING POSITIONS
10 Use parking position on the side (A) or underneath (C) to carry and
store the cleaner. At the back (B) when you pause (save your back).
REPLACING THE DUSTBAG, SBA
11 Replace the s-bag when
- P* Models with rotary knob: S-BAG indicator lights up in red
- Q* Models with remote control: S-BAG symbol lights up red.
- R* Models with remote control and AUTO: S-BAG indicator lights up
in red (green light: bag is OK, yellow light: soon time to replace bag).
NB: Always change the s-bag when S-BAG indicator is illuminated or
has red light even if the s-bag is not full (it may be blocked) and after
using carpet cleaning powder. For best possible performance, use the
Ultra Long Performance bag which is especially developed for your
cleaner. Other synthetic s-bags can also be used. Do not use paper dust
bags! www.s-bag.com
12 Pull the S-BAG button to open the dust compartment. The handle of
the s-bag holder goes up. Pull the handle to remove the s-bag with
holder. Do not press the release button.
13 Hold the s-bag with holder over a dust bin. Press the button to release
the s-bag. Insert a new s-bag to the holder by inserting the cardboard
at the back of the holder.
14 Insert the s-bag with holder by pushing it straight down in its tracks.
Make sure the s-bag is not stuck under the holder. Close the lid. If the
s-bag is not properly placed or is missing, the lid will not close.
NB: When you start the cleaner after s-bag replacement, It takes 10
seconds before the S-BAG indicator turns o (P* Models with rotary
knob and Q* Models with remote control) or turns green (R* Models
with remote control and AUTO).
REPLACING THE FILTERS
15 Replace/clean** the lter when (**washable lter only)
- P* Models with rotary knob: you have changed the s-bag 5 times
- Q* Models with remote control: FILTER symbol lights up in red
- R* Models with remote control and AUTO: lter indicator lights up
in red. Green light indicates that the lter is ok. It lights up briey when
you start the vacuum cleaner.
16 Pull the FILTER button to open the lter lid. Use original s-lters.
Remove the lter and check the reference on the frame to dene type.
Replace with a new lter or clean it**. Rinse the inside (dirty side) in
lukewarm tap water. Tap the lter frame to remove the water. Repeat
the process four times. (*
*washable lter only)
NB: Do not use cleaning agents. Avoid touching the lter surface.
Let the lter dry completely (min. 24 h in room temperature) before
putting back ! Change the washable lter at least once a year or when it
is very dirty or damaged. Do not remove the L-shaped foam under the
lter.
17 After replacing the lter, close the lter lid until it is clicked back into
place. If the lter lid comes o, position the hinges at the bottom and
push the lter lid until it is clicked back into place.
NB: When you start the cleaner after lter replacement, It takes 10
seconds before the FILTER indicator turns green (models with remote
control and AUTO function) or turns o (remote control models).*
18 Replace the motor lter when dirty or after every 5th s-bag. Push the
lter holder down and pull it out. Exchange the lter and close the lid.
VACUUMING WITH THE UNIVERSAL NOZZLE V*, W*
19 Change nozzle setting with the pedal. Icon illustrates recommended
oor type.
20 PureVision nozzle*: Move the nozzle forward. The front light turns on
automatically after a few seconds. When the nozzle is not used, the
light turns o automatically after a few seconds.
CLEANING THE UNIVERSAL NOZZLE V*, W**
21 Disconnect the nozzle from the tube. Clean with the hose handle.
CLEANING THE TURBO NOZZLE X*
22 Disconnect the nozzle from the tube and remove entangled threads etc
by snipping them away with scissors. Use the hose handle to clean the
nozzle. *
3IN1 ACCESSORY TOOL
23 Pull the textile tab to take out 3in1 tool. The tool has 3functions, see
pictures on next page.
24 After usage, put it back in its place.
2www.electrolux.com
GB
FR
AR
BG
GR
NO
CZ
HR
PL
DE
HU
PT
DK
IT
RO
EE
LT
RU
ES
LV
SE
SL
FI
NL
SK
SR
TR
UA
Prenesi priročnik v slovenščini (PDF, 6.04 MB)
(Upoštevajte okolje in natisnite ta priročnik le, če je res potrebno)

Loading…

Ocena

Povejte nam, kaj menite o Electrolux PD91-4DB Sesalnik, tako da oddate oceno izdelka. Ali želite deliti svoje izkušnje z izdelkom ali postaviti vprašanje? Oddajte komentar na dnu strani.
Ali ste zadovoljni z Electrolux PD91-4DB Sesalnik?
Da Ne
0%
100%
1 glas

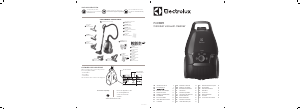
Pridružite se pogovoru o tem izdelku

Tukaj lahko delite svoje mnenje o Electrolux PD91-4DB Sesalnik. Če imate vprašanje, najprej natančno preberite priročnik. Zahtevo za priročnik lahko opravite z uporabo našega kontaktnega obrazca.

A.Willi 18-02-2023
Sesalnik vedno ugasne in za kratek čas zasveti rdeča lučka (S-Bag). Potem gre ven. Filter zamenjan, vreča je nova/prazna. Kaj bi to lahko bilo (star je 3 leta). Kot da bi bil senzor v okvari. Kaj bi človek lahko počel tam?

odgovori | To je bilo koristno (0) (Prevedel Google)

Več o tem priročniku

Zavedamo se, da je lepo imeti papirni priročnik za vaš Electrolux PD91-4DB Sesalnik. Priročnik lahko vedno prenesete z naše spletne strani in ga natisnete sami. Če želite imeti originalni priročnik, priporočamo, da kontaktirate Electrolux. Morda bodo lahko zagotovili originalni priročnik. Ali iščete priročnik za vaš Electrolux PD91-4DB Sesalnik v drugem jeziku? Na naši domači strani izberite želeni jezik in poiščite številko modela, da preverite, ali je na voljo.

Specifikacije

Blagovna znamka Electrolux
Model PD91-4DB
Kategorija Sesalniki
Vrsta datoteke PDF
Velikost datoteke 6.04 MB

Vsi priročniki za Electrolux Sesalniki
Več priročnikov za Sesalniki

Pogosto zastavljena vprašanja o Electrolux PD91-4DB Sesalnik

Naša podporna ekipa išče uporabne informacije o izdelkih in odgovore na pogosta vprašanja. Če v pogosto postavljenih vprašanjih odkrijete nenatančnost, nam to sporočite prek obrazca za stik.

Cev mojega sesalnika je zamašena, kaj lahko storim? Potrjeno

Odklopite cev in jo preglejte, da ugotovite, ali je dejansko zamašena. V tem primeru lahko vzamete dolg predmet, na primer metlo, in ga previdno potisnete skozi cev. S tem boste na splošno odstranili vse predmete, ki zamašijo cev. Če vam to ni pomagalo, se obrnite na proizvajalca.

To je bilo koristno (1464) Preberi več

Kakšne velikosti so vrečke za prah? Potrjeno

Upoštevati je treba dve velikosti. Najprej je velikost plošče z vhodom v vrečo. To določa, ali bo vrečka za prah prilegala določenemu sesalniku. Potem je velikost vrečke. To je večinoma označeno v litrih in določa, koliko prahu lahko vsebuje vreča.

To je bilo koristno (941) Preberi več

Zanima me starost moje naprave Electrolux. Kako to naredim? Potrjeno

Starost izdelka lahko določite s serijsko številko. To je mogoče najti v vaši napravi. Prvi znak serijske številke označuje leto (tj. 1 = 2001), dva znaka za tem pa teden proizvodnje (tj. 35 = 35. teden tega leta). Torej serijska številka 13500016 označuje, da je stroj iz 35. tedna leta 2001.

To je bilo koristno (835) Preberi več

Napajalni kabel sesalnika se ne vrne nazaj v napravo. Kaj lahko storim? Potrjeno

Možno je, da se kabel zasuka ali prepogne. Nekajkrat popolnoma razvaljajte kabel in ga pod vodstvom rok zvijte nazaj v napravo. Če to ne reši težave, je možno, da je mehanizem za previjanje vrvice pokvarjen. V tem primeru se obrnite na proizvajalca ali servisno službo.

To je bilo koristno (657) Preberi več

Moj sesalnik zasliši, kaj lahko storim? Potrjeno

To težavo pogosto povzroča polna vreča za prah ali filter ali če obstaja odprtina, ki prepušča zrak v cev. Preverite vrečko za prah in filter ter ju po potrebi zamenjajte. Preverite, ali so na ceveh luknje ali slabe povezave. Če težave ne odpravite, se obrnite na proizvajalca.

To je bilo koristno (551) Preberi več

Kako odstranim prah in dlake z glave ščetke sesalnika? Potrjeno

Odstranjevanje prahu in las z glave ščetke sesalnika je izvedeno ročno. Če to ne gre po želji, lahko s finim glavnikom odstranite preostalo umazanijo.

To je bilo koristno (536) Preberi več

Katero nastavitev na glavi krtače sesalnika naj uporabim? Potrjeno

Skoraj vsi sesalniki imajo glavo z nastavljivo krtačo. Uporabite krtačo za trde površine, da preprečite praske in poškodbe. Izklopite krtačo za preproge in preproge.

To je bilo koristno (419) Preberi več

Ali lahko večkrat uporabim papirnato vrečko za prah? Potrjeno

To ni priporočljivo. Pore ​​vrečke se bodo nasičile, kar bo povzročilo izgubo sesanja in lahko poškodovalo motor.

To je bilo koristno (286) Preberi več

Kaj je HEPA? Potrjeno

HEPA pomeni visoko učinkovit zrak v trdnih delcih. Številni sesalniki imajo HEPA filter. HEPA filter bo ustavil vsaj 85% in največ 99,999995% vseh delcev 0,3 mikrometra (µm) in več.

To je bilo koristno (259) Preberi več

Ali lahko za sesanje pepela uporabim navaden sesalnik? Potrjeno

Ne, to absolutno ni mogoče. Pepel, ki se zdi ohlajen, je v notranjosti še vedno topel ali celo vroč. Običajni sesalnik za to ni zasnovan in lahko povzroči požar. Poleg tega filtri običajnih sesalnikov niso vedno primerni za zadrževanje izredno majhnih delcev, kot je pepel. Nato lahko doseže motor sesalnika in povzroči škodo.

To je bilo koristno (251) Preberi več
Priročnik Electrolux PD91-4DB Sesalnik

Podobni izdelki

Sorodne kategorije