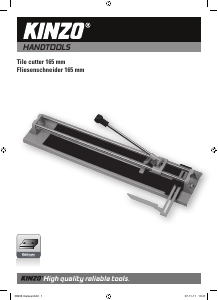
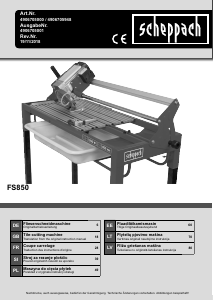
Priročnik FERM TCM1001 Stroj za rezanje ploščic
Potrebujete priročnik za vaš FERM TCM1001 Stroj za rezanje ploščic? Spodaj si lahko brezplačno ogledate in prenesete PDF priročnik v slovenščini. Ta izdelek ima trenutno 3 pogosto zastavljeni vprašanji, 0 komentarjev in ima 0 glasov. Če to ni priročnik, ki ga želite, nas kontaktirajte.
Ali je vaš izdelek okvarjen in v priročniku ne najdete rešitve? Obiščite Repair Café za brezplačno popravilo.
Priročnik
Loading…


Loading…
Ocena
Povejte nam, kaj menite o FERM TCM1001 Stroj za rezanje ploščic, tako da oddate oceno izdelka. Ali želite deliti svoje izkušnje z izdelkom ali postaviti vprašanje? Oddajte komentar na dnu strani.Več o tem priročniku
Zavedamo se, da je lepo imeti papirni priročnik za vaš FERM TCM1001 Stroj za rezanje ploščic. Priročnik lahko vedno prenesete z naše spletne strani in ga natisnete sami. Če želite imeti originalni priročnik, priporočamo, da kontaktirate FERM. Morda bodo lahko zagotovili originalni priročnik. Ali iščete priročnik za vaš FERM TCM1001 Stroj za rezanje ploščic v drugem jeziku? Na naši domači strani izberite želeni jezik in poiščite številko modela, da preverite, ali je na voljo.
Specifikacije
| Blagovna znamka | FERM |
| Model | TCM1001 |
| Kategorija | Stroji za rezanje ploščic |
| Vrsta datoteke | |
| Velikost datoteke | 0.6 MB |
Vsi priročniki za FERM Stroji za rezanje ploščic
Več priročnikov za Stroji za rezanje ploščic
Pogosto zastavljena vprašanja o FERM TCM1001 Stroj za rezanje ploščic
Naša podporna ekipa išče uporabne informacije o izdelkih in odgovore na pogosta vprašanja. Če v pogosto postavljenih vprašanjih odkrijete nenatančnost, nam to sporočite prek obrazca za stik.
Kakšna je razlika med keramičnimi ploščicami in porcelanskimi ploščicami? Potrjeno
Oba sta narejena iz gline, vendar imajo porcelanske ploščice večjo gostoto. Zaradi tega so porcelanske ploščice močnejše in trpežnejše, hkrati pa jih je težje rezati. Za enak rezultat kot pri keramičnih ploščicah potrebujete posebna orodja in spretnosti.
To je bilo koristno (13) Preberi večAli je pomembno, katero stran ploščice sem izrezal? Potrjeno
Da, ne glede na to, katero ploščico režete, je najbolje, da jo režete s sprednjo stranjo ploščice navzgor. To bo zagotovilo gladko končno obdelavo in zmanjšalo tveganje sekanja.
To je bilo koristno (10) Preberi večKako lahko med rezanjem preprečim, da bi se moje ploščice zdrobile? Potrjeno
Pred rezanjem lahko na vrh ploščice nalepite lepilni trak, da zmanjšate sekanje.
To je bilo koristno (10) Preberi več
Pridružite se pogovoru o tem izdelku
Tukaj lahko delite svoje mnenje o FERM TCM1001 Stroj za rezanje ploščic. Če imate vprašanje, najprej natančno preberite priročnik. Zahtevo za priročnik lahko opravite z uporabo našega kontaktnega obrazca.