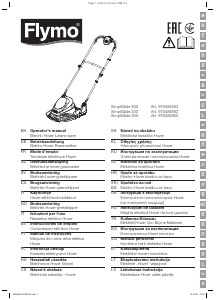
Priročnik Flymo SimpliGlide 300 Vrtna kosilnica

Potrebujete priročnik za vaš Flymo SimpliGlide 300 Vrtna kosilnica? Spodaj si lahko brezplačno ogledate in prenesete PDF priročnik v slovenščini. Ta izdelek ima trenutno 8 pogosto zastavljeni vprašanji, 0 komentarjev in ima 0 glasov. Če to ni priročnik, ki ga želite, nas kontaktirajte.

Ali je vaš izdelek okvarjen in v priročniku ne najdete rešitve? Obiščite Repair Café za brezplačno popravilo.

Priročnik

Loading…

Maintenance and storage
a) Keep all nuts, bolts, and screws tight to be sure the machine is in safe
working condition.
b) Check the grass collector frequently for wear or deterioration.
c) Replace worn or damaged parts for safety.
d) On machines with multi blade, take care as rotating one blade can cause
other blades rotate.
e) Be careful during adjustment of the machine to prevent entrapment of the
fingers between moving blades and fixed parts of the machine.
f) Always allow the machine to cool down before storing.
g) When servicing the blades be aware that, even though the power source is
switched off, the blades can still be moved.
h) Use only genuine replacement parts and accessories.
Additional safety warnings
Electrical safety
DANGER! Cardiac arrest!
This product makes an electromagnetic field while it operates. This field
may under some conditions interfere with active or passive medical
implants. To decrease the risk of conditions that can possibly injure or
kill, we recommend persons with medical implants to speak with their
physician and the medical implant manufacturer before you operate the
product.
Before use, examine the cable for signs of damage or ageing. If the cable is
found to be defective, take the product to an authorised Service Centre and have
the cable replaced.
Do not use the product if the electric cables are damaged or worn.
Immediately disconnect from the mains if the cable is cut, or the insulation is
damaged. Do not touch the electric cable until the cable has been disconnected.
Do not repair a cut or damaged cable. Replace it with a new one.
The extension cable must be uncoiled. Coiled cables can overheat and reduce
the efficiency of your mower.
Keep the extension cable away from product, always work away from the power
point mowing up and down, never in circles.
Do not pull cable around sharp objects.
Always switch off at the mains before disconnecting any plug, cable connector
or extension cable.
Stop the motor, disconnect the mains and examine the cable for damage or
ageing before you wind the cable for storage. Do not repair a damaged cable,
replace it with a new one. Use only genuine replacement cable.
Always wind the cable carefully, avoid kinking.
Do not carry the product by the cable.
Do not pull on the cable to disconnect any of the plugs.
Use only on AC mains supply voltage shown on the product rating label.
Our products are double insulated to EN60335. Do not connect an earth to
any part of the product.
Check the working area for hidden cables.
Do not use for pond care or close to water.
Personal safety
DANGER! Risk of suffocation!
Small parts can be easily swallowed. There is also a risk that the poly-
bagcan suffocate toddlers. Keep toddlers away when you assemble the
product.
Let the hover mower to cool down for at least 30 minutes before storage or
maintenance.
If blockage of cutting element stop product and check.
Do not tilt the machine into the direction of the user.
Do not move backwards.
Stay alert during operation.
Do not use in explosive atmosphere.
Do not operate the product when you are tired, ill or under the influence of
alcohol, drugs or medicine or when you are exhausted.
Do not overload the mower.
Use gloves, wear slip resistant shoes and wear eye protection.
Do not use under wet conditions.
Do not use on wet grass.
Do not disassemble the product further than the delivery status.
Only start the mower with an upright standing handle.
Do not use the start levers alternately.
Use the handles carefully.
Safety Cut-Out
The motor is protected by a Safety Cut-Out which is activated when the blade
becomes jammed or if the motor is overloaded. When this occurs, stop and dis-
connect the product from the mains. The Safety Cut-Out will only reset when you
release the start / stop lever. Clear any obstruction and wait for a few minutes for
the Safety Cut-Out to reset before you continue to use the product.
2. ASSEMBLY
DANGER! Risk of injury!
Cut injury when the product starts accidentally.
v Wait for the blade to stop, disconnect the product from the
mains and use gloves before you assemble the product.
To assemble the lower handle [ Fig. A1 ]:
1. Place the end of the lower handle
1
into the slots on the deck
2
.
2. Secure the lower handles
1
to the deck
2
by firmly pushing fixing
pin
3
through the holes in the deck
2
and handle
1
.
3. Repeat on the other side.
NOTE: Should a problem occur when securing the handle to the deck
with the fixing pin, carefully lever fixing pin out of location and repeat
steps 1 to 3 above.
To assemble the upper handle [ Fig. A2 / A3 ]:
1. Make sure that the upper handle
4
is located correctly with the safety
lock-off button
5
on the switchbox facing upwards.
2. Make sure that the upper handle
4
and the lower handle
1
are aligned
correctly.
3. Insert the nut into the handle knob
6
(if necessary).
4. Fit the bolts
8
, the washers
7
and the handle knobs
6
onto the
handles
1
/
4
in the correct positions.
5. Attach the cable
9
to the handles
1
/
4
with the clips
0
provided.
Make sure that the cable
9
is not trapped between the upper
handle
4
and lower handle
1
.
3. OPERATION
DANGER! Risk of injury!
Cut injury when the product starts accidentally.
v Wait for the blade to stop, disconnect the product from
the mains and use gloves before you adjust or transport
the product.
To connect the mower [ Fig. O1 / O2 ]:
DANGER! Electric shock!
To avoid damage to the extension cable
q
, the extension
cable
q
must be inserted into the cable lock
-
.
v Before you operate insert the extension cable
q
into the cable
lock
-
.
1. Connect the female extension cable
q
connector to the back of the
switchbox
w
.
2. Form a loop in the extension cable
q
, insert the loop into the cable
lock
-
slot in the switchbox
w
and pull tight.
3. Connect the extension cable
q
into a 230 V mains socket.
To adjust the cutting height [ Fig. O3 / O4 / O5 ]:
CAUTION! Do not use more than 3 cutting height
spacers
e
. The cutting height spacers
e
must only be fitted
between the blade
r
and the fan
t
. Do not fit the cutting height
spacers
e
between the blade
r
and the blade bolt
z
.
1. To remove the blade bolt
z
, hold the fan
t
firmly and loosen the blade
bolt
z
with the spanner
u
provided.
2. Remove the blade bolt
z
, the blade
r
, the cutting height spacers
e
and the fan
t
.
3. Inspect for damage and clean as necessary.
4. Put the fan
t
on the product.
Make sure that the fan
t
is fully in place and the hole of the fan is inline
up with the threaded hole.
5. Put the cutting height spacers
e
onto the fan
t
.
Higher Cut – less cutting height spacers
Lower Cut – more cutting height spacers
Make sure that the pegs have located into the holes.
6. Put the blade
r
on by aligning the D-shaped holes onto the cutting
height spacers
e
.
Make sure that the pegs have located into the holes on the blade.
EN
5
Page 2 width 2 mm less: 208 mm
SG300EU-20.960.01.indd 5 24.10.20 07:07
Prenesi priročnik v slovenščini (PDF, 9.64 MB)
(Upoštevajte okolje in natisnite ta priročnik le, če je res potrebno)

Loading…

Ocena

Povejte nam, kaj menite o Flymo SimpliGlide 300 Vrtna kosilnica, tako da oddate oceno izdelka. Ali želite deliti svoje izkušnje z izdelkom ali postaviti vprašanje? Oddajte komentar na dnu strani.
Ali ste zadovoljni z Flymo SimpliGlide 300 Vrtna kosilnica?
Da Ne
Bodite prvi, ki boste ocenili ta izdelek
0 glasovi

Pridružite se pogovoru o tem izdelku

Tukaj lahko delite svoje mnenje o Flymo SimpliGlide 300 Vrtna kosilnica. Če imate vprašanje, najprej natančno preberite priročnik. Zahtevo za priročnik lahko opravite z uporabo našega kontaktnega obrazca.

Več o tem priročniku

Zavedamo se, da je lepo imeti papirni priročnik za vaš Flymo SimpliGlide 300 Vrtna kosilnica. Priročnik lahko vedno prenesete z naše spletne strani in ga natisnete sami. Če želite imeti originalni priročnik, priporočamo, da kontaktirate Flymo. Morda bodo lahko zagotovili originalni priročnik. Ali iščete priročnik za vaš Flymo SimpliGlide 300 Vrtna kosilnica v drugem jeziku? Na naši domači strani izberite želeni jezik in poiščite številko modela, da preverite, ali je na voljo.

Specifikacije

Blagovna znamka Flymo
Model SimpliGlide 300
Kategorija Vrtne kosilnice
Vrsta datoteke PDF
Velikost datoteke 9.64 MB

Vsi priročniki za Flymo Vrtne kosilnice
Več priročnikov za Vrtne kosilnice

Pogosto zastavljena vprašanja o Flymo SimpliGlide 300 Vrtna kosilnica

Naša podporna ekipa išče uporabne informacije o izdelkih in odgovore na pogosta vprašanja. Če v pogosto postavljenih vprašanjih odkrijete nenatančnost, nam to sporočite prek obrazca za stik.

Kako vem, kdaj moram nabrusiti rezila vrtne kosilnice? Potrjeno

Ostra rezila naredijo čisti rez.Topa rezila travo grobo odrežejo, trava pa bo hitro postala rjava.Če po košenju ostane scefrana trava, rezila nabrusite ali zamenjajte.

To je bilo koristno (2413) Preberi več

Kaj je mulčenje? Potrjeno

Nekatere kosilnice lahko mulčijo. Mulčenje drobno raztrga travo in jo odpihne nazaj na travnik. Tam zastirka deluje kot prehrana in zaščita trave.

To je bilo koristno (792) Preberi več

Po nesreči sem v bencinsko kosilnico vtaknil dizel, kaj naj storim? Potrjeno

NE uporabljajte kosilnice. Edina možnost je popolnoma izprazniti rezervoar in ga napolniti s pravim gorivom.

To je bilo koristno (721) Preberi več

Katera je najboljša dolžina moje trave? Potrjeno

Da se trava ne izsuši, ne sme biti prekratka. Bolje je, da travo kosite pogosteje, kot da jo prekratko kosite. Optimalna dolžina je med 3 in 4 centimetri.

To je bilo koristno (422) Preberi več

Ali lahko kosim travo, ko je mokra? Potrjeno

Možno je, vendar ni priporočljivo. Ko je trava mokra, se bo med košnjo strgala, kar preprečuje optimalen rezultat.

To je bilo koristno (286) Preberi več

Kdaj je pravi trenutek, da pokosim svojo trato? Potrjeno

Najboljši meseci za košnjo trate so od marca do oktobra. Košnjo je treba opraviti enkrat ali dvakrat na teden, odvisno od tega, kako hitro raste trava. Najboljši čas dneva za košnjo trave je konec popoldneva in nikoli na polni sončni svetlobi. S tem preprečimo, da bi se trava po kositvi izsušila.

To je bilo koristno (257) Preberi več

Ali lahko pustim, da robotska kosilnica deluje ponoči? Potrjeno

Bolje je, da ne pustite robotske kosilnice delati ponoči. Nekatere živali, kot so ježi, so večinoma aktivne ponoči. Pogosto niso dovolj hitri, da bi pobegnili iz robotske kosilnice in jih lahko hudo ranijo ali ubijejo.

To je bilo koristno (208) Preberi več

Na kateri površini travnika izberem električno kosilnico in na kateri površini bencinsko kosilnico? Potrjeno

Za površine do 300 m² lahko uporabite baterijsko kosilnico. Za površine, večje od te, je priporočljivo uporabiti bencinsko kosilnico.

To je bilo koristno (207) Preberi več
Priročnik Flymo SimpliGlide 300 Vrtna kosilnica

Podobni izdelki

Sorodne kategorije