Dear Customer,
Please read the following information carefully before using
the appliance for the first time for your own safety and to
ensure correct use.
Attention! The appliance may only be used for normal domestic
use and not for industrial purposes.
Important safety advice
The appliance must only be used as described in the v
instructions for use! Use for any other purpose is forbidden! Any
damage resulting from improper use and non-observance of the
safety information will invalidate any liability and warranty!
All liability is disclaimed for any frost damage caused by a v
heating capacity that is insufficient for the room size, bad
heat insulation of the room, incorrect use or force majeure
(e.g. power failure).
Only connect the appliance to A.C. mains as specified on v
the rating plate!
Never touch live parts! Danger to life! v
Never operate the appliance with wet hands! Danger to life! v
The appliance must be placed in a way that the control elements v
cannot be touched by persons who are in bath, shower, or any
other water-filled receptacle.
Do not use the appliance in rooms with bath, shower or v
swimming pool or in the vicinity of wash basins or water
connections!
Do not expose the appliance to rain or other moisture! The v
appliance is nor for outdoor use. The appliance must only be
stored indoors!
Never use the appliance if the appliance or cord is damaged. v
Risk of injury!
Check the power cord regularly for damage. v
If the power cord or if the appliance is damaged to the extent v
that electrical parts are exposed, disconnect it immediately
from the mains and see your authorised retailer!
Improper repairs can expose the user to considerable v
danger.
The appliance may only be opened up and repaired by v
authorised qualified personnel.
Do not store or use any flammable materials or sprays in v
the vicinity of the appliance when the appliance is in use.
Fire hazard!
Do not use the appliance in flammable atmospheres (e.g. in v
the vicinity of combustible gases or spray cans)! Explosion
and fire hazard!!
The appliance should not be used in areas which are a fire risk, v
such as garages, stables, or wooden sheds.
Important! v Do not insert any foreign objects into the appliance
openings! Risk of injury (electric shock) and damage to the
appliance!
The appliance air inlet and outlet openings must not be v
obstructed in any way!
Place the appliance so that it cannot be touched by accident. v
Risk of burns!
v WARNING: IN ORDER TO AVOID OVERHEATING,
DO NOT COVER THE HEATER.
The heater carries the Warning symbol indicating
that it must not be covered.
The appliance is not suitable for connection to permanent v
wiring!
The appliance is not intended for use by young children or v
infirm persons without supervision!
Young children should be supervised to ensure that they do v
not play with the appliance!
The socket-outlet must be accessible at all times to enable the v
mains plug to be disconnected as quickly as possible!
Attention! v To avoid any danger due to unintentionally resetting
the thermal cut-out, the appliance must not be supplied via
a timer.
The appliance is not suitable for animal breeding purposes! v
The instruction leaflet belongs to the appliance and must be v
kept in a safe place. When changing owners, the leaflet must
be surrendered to the new owner!
Packaging
After unpacking the appliance, check the same for transport v
damage and the contents for completeness! In the event of
damage or an incomplete delivery, contact your authorised
retailer!
Do not discard the original box! It can be used for storage and v
dispatch to avoid transport damage!
Dispose of the packaging material in a proper manner! Plastic v
bags should be kept away from children!
Location
The appliance should be placed with a minimum distance of v
50cm from flammable objects, walls or other structures! The
appliance openings must not be obstructed in any way!
Do not place the appliance on instable surfaces (e.g. a bed), v
where it can tip over!
The appliance must not be located below a socket outlet! v
The appliance must not be operated directly on high pile v
carpets.
The appliance can be tilted to adjust the required blow out v
direction at the base.
Power cord
Only use an approved extension cord that is suitable for the v
appliance rating!
Position the power cord so that it does not pose a tripping v
hazard and possibly cause the appliance to be knocked
over.
The power cord must not come into contact with hot appliance v
parts!
Never pull the plug out of the socket at the cord! v
Never move the appliance by pulling at the cord or use the v
cord for carrying purposes!
Do not coil the cord around the appliance! Do not use the v
appliance with the cord coiled! This applies particularly if a
cable drum is used.
Do not crush the cord or drag it over sharp edges. Do not place v
it over heated hotplates or naked flames!
Start up
After switching on the appliance for the first time and after v
an extended period of non-use, a smell may be noticed for
a short time.
To use, insert the plug in the socket. v
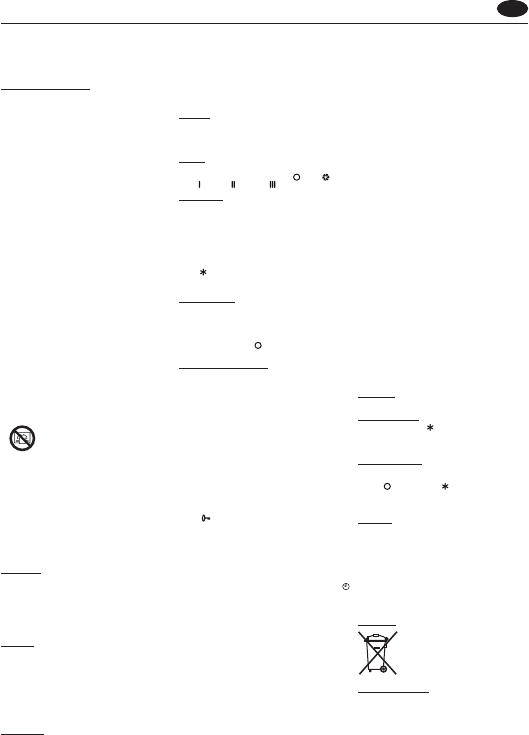
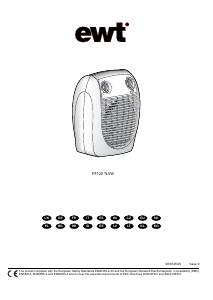
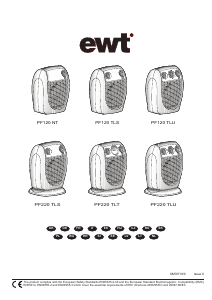
Switch (S) (see fig. 2)
With the selector, the fan can be switched on or the power setting
selected. There are five selection options: ‘ ’ – Off / ‘
’ – Cold
Blow / ‘ ’ – 800W / ‘ ’ – 1200W / ‘ ’ – 2000W
Thermostat (T) (see fig. 2)
In order to maintain a certain room temperature, set the controller
to “max.”. Operate the appliance at full power until the required
room temperature is reached. Set back the thermostatic controller
until the appliance switches off with an audible “click”. This
temperature will be kept almost constant by the thermostatic
control switching on and off automatically.
Please note that the appliance can only be switched on when the
thermostat setting is higher then the room temperature.
Attention! The unit is ready for use even when at the lowest
setting ‘ ’.
In order to switch off the appliance, pull out the power supply
plug.
Runback timer (U) (TLU only)
With the timer the appliance can be operated for a maximum of
60 minutes without interruption. The time can be reset at any time
also during operation.
Attention! During timer operation, the thermostat function is
inactive!
With the timer in position ‘ ’ Operation is controlled be the
temperature/ switch control settings.
Digital Timer Operation
IMPORTANT: Remember to observe all safety warnings
when operating the heater on auto setting, either attended or
unattended.
The timer allows you to select ‘AUTO DAILY’, ‘AUTO BLOCK’,
‘MANUAL ON’ or ‘MANUAL OFF’ operation MODE by pressing
the ‘‘MODE’’ button until the required MODE appears at the bottom
of the timer display.
‘AUTO DAILY’ MODE allows the heater to switch ON and OFF
according to a set daily program everyday (see ‘Setting Programs’
section below).
‘AUTO BLOCK’ MODE allows the heater to switch ON and OFF
according to set of programs for weekdays only and another set
for weekends only.
‘MANUAL ON’ MODE allows power to the heater uninterrupted
by the program settings.
‘MANUAL OFF’ MODE switches off all heater operation
completely.
Key Lock:
If ‘ENTER’ and ‘MODE’ are pressed within 1 second, the keys
will be locked. The user will know the keys are locked as the lock
symbol ‘ ’ will be displayed on the top left hand corner of the
screen. To unlock the keypad, press ‘ENTER’ and then ‘MODE’
within 1 second.
Initial Operation
For initial use, plug the heater into a regular household power
point and turn the power on. The timer is now ready to be set
up for use.
Setting Current Time
1. Press the ‘PROGRAM’ button ONCE. The clock symbol
appears on the top left hand side of the screen. The user can
now set the clock.
2. The hour digit will flash. To adjust the hour use the ‘-‘ & ‘+’
buttons. Confirm the hour digit by pressing ‘ENTER’.
3. Once ‘ENTER’ has been pressed the minutes will flash. To
adjust the minutes use the ‘-‘ & ‘+’ buttons. Confirm the minute
digit by pressing ‘ENTER’.
4. Once ‘ENTER’ has been pressed the arrow will flash next
to Mon. use the ‘-‘ & ‘+’ buttons to set current day and press
‘ENTER’ to confirm. (This function is available only on the 7day
timer)
5. Pressing final ‘ENTER’ returns to default display.
6. To reset incorrect time, repeat previous steps.
Once the correct time is set, a total of 12 ON/OFF time programs
can be set for operation. There are two program options.
OPTION 1; DAILY (‘DLY’ on display): This is a daily program
function, Monday to Sunday with four ON/OFF program options
available.
OPTION 2; BLOCK (‘BLK’ on display): This is a block program
function, Monday to Friday with four ON/OFF program options &
Saturday to Sunday with four ON/OFF program options.
Setting Programmes
This timer allows Block programming. This means you can
have four ON/OFF programs to run daily Monday to Sunday
(DLY) or you can have four ON/OFF programs to run Monday
to Friday and another four ON/OFF programs to run Saturday
and Sunday (BLK).
Press the ‘PROGRAM’ key twice to set the programs.
You are now setting the programs starting with ‘Daily ‘ON’ P1.
SETTING P1 ON TIME:
1. To set the hour use the ‘-‘ & ‘+’ buttons. Confirm the hour digit
by pressing ‘ENTER’.
2. To set the minutes use the ‘-‘ & ‘+’ buttons. Confirm the minute
digit by pressing ‘ENTER’.
Note: The minutes can only be set in 10 minute blocks in
programme ‘MODE’.
SETTING P1 OFF TIME:
3. To set the hour use the ‘-‘ & ‘+’ buttons. Confirm the hour digit
by pressing ‘ENTER’.
4. To set the minutes use the ‘-‘ & ‘+’ buttons. Confirm the minute
digit by pressing ‘ENTER’.
Repeat steps 1 to 4 to programme P2, P3 & P4. After programming
P4 you automatically enter the BLOCK programme option. Repeat
steps 1 to 4 to programme P2, P3 & P4. After programming P4
you automatically exit to the default display.
At any time while programming the timer you can press the
‘PROGRAM’ button to exit to the default display.
NOTE: You can cycle quickly from weekdays to weekends by
pressing the ‘MODE’ button. There are 4 programmable programs
each for both weekdays and weekends.
The Advance Function
When in ‘AUTO’ MODE, if the ‘+’ button is pressed for longer
than 2 seconds the programme will ADVANCE to the next setting
programmed and will only revert back to the program when the
subsequent programme time is reached. When the ‘ADVANCE’
function is running the ‘ADVANCE’ segment will be displayed on
the LCD screen. If the ‘-‘ button is pressed when the ‘ADVANCE’
programme is running the ‘ADVANCE’ feature will be automatically
cancelled and the programme will run as normal.
Note - Timer Memory Back Up Batteries - Once the heater
has been left plugged in with the socket switched on for at least
72 hours the timer’s memory back up batteries will be fully
charged.
Once the timer batteries are fully charged, if there is a power cut
or if the heater is disconnected from the mains for less than six
months, then the timer will continue to keep time & the settings in
the memory will remain intact.
If however the timer back up batteries have not been charged
fully, or if the heater is deprived of power for longer than six
months, then the time and the programme settings are likely
to be lost and you may therefore need to reset the time and
the programme before using the AUTO MODE again.
Transport (see fig. 4)
The appliance is provided with a handle for easy carrying
Frost protection (see fig. 2)
Set the thermostat to ‘ v ’ and the switch to the required the
heating output.
When the temperature falls below +5 °C…+8 °C, the appliance v
switches on automatically.
Overheat cut-out
The built-in overheat cut-out switches off the appliance
automatically in the event of a fault! Switch off the appliance (set
switch to ‘ ’ and thermostat to ‘ ’) or disconnect the mains plug
from the socket. After a short cooling down phase, the appliance
is ready for use again! If the fault should occur again, see your
local dealer!
Cleaning
Switch off the appliance first and disconnect the plug from v
the socket!
Clean the housing with a moist cloth, vacuum cleaner or v
brush.
Do not use any abrasive or caustic cleaning agents! v
Do not use any flammable cleaning agents e.g. petrol or spirit v
for cleaning the appliance.
Never immerse the appliance in water! Danger to life! v
Air inlet- and outlet area should be cleaned with a vacuum v
cleaner regularly
If the appliance is not used for extended periods, it must be v
protected against excessive dust and dirt.
Recycling
For electrical products sold within the European
Community.
At the end of the electrical products useful life it
should not be disposed of with household waste.
Please recycle where facilities exist. Check with
your Local Authority or retailer for recycling advice
in your country.
After sales service
All repairs must be referred to authorised personnel!
See your local dealer.
Any tampering with the appliance will invalidate the warranty.
Repairs carried out improperly and by unqualified persons may
have serious consequences for the user!
In the interests of further development, the appliance may
be subject to constructional or design changes without
prior notice.
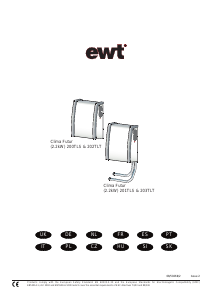
UK
- 1 -


Pridružite se pogovoru o tem izdelku
Tukaj lahko delite svoje mnenje o EWT PF220 TLT Grelnik. Če imate vprašanje, najprej natančno preberite priročnik. Zahtevo za priročnik lahko opravite z uporabo našega kontaktnega obrazca.